Discover the delightful world of ragi bread, a nutritious and gluten-free alternative to traditional wheat bread. Made from finger millet, or ragi, this ancient grain boasts a wealth of health benefits, including high fiber content, rich iron, and essential vitamins. Its subtly nutty flavor and slightly grainy texture offer a unique and satisfying eating experience, perfect for those seeking a healthier and more flavorful bread option. Ragi bread is remarkably versatile, equally delicious toasted with butter or used as a base for sandwiches and other culinary creations.
This versatile bread is surprisingly simple to make at home. Ready to experience the delightful taste and nutritional value of homemade ragi bread? Let's dive into the easy step-by-step process outlined below to create your own loaf of this wholesome and delicious bread.
Tools Needed
- Mixing bowls
- Measuring spoons
- Cloth
- Baking tin
- Baking paper
- Oven or OTG
Ingredients
- Ragi flour: 2 cups
- Wheat flour: 1 cup
- Powdered sugar: 3 tablespoons
- Yeast: 1 tablespoon
- Salt: ½ teaspoon
- Water or warm milk: 1 cup
- Oil or melted butter: 2 tablespoons
- White sesame seeds
- Nuts
Step-by-Step Instructions
Step 1. Prepare and Rest the Dough
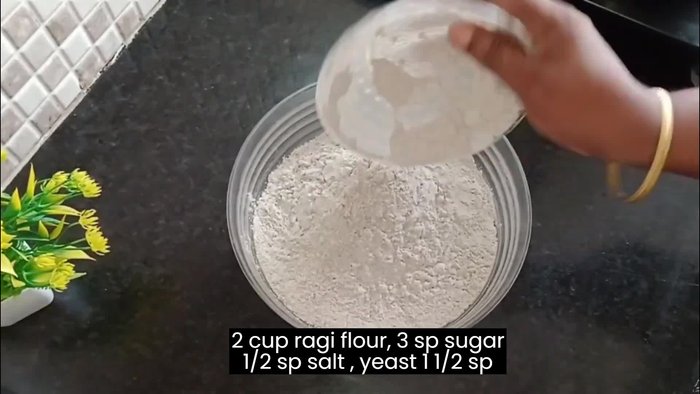
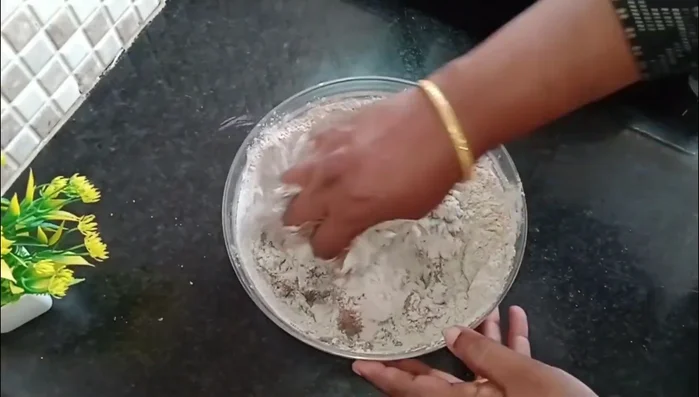
- Mix 2 cups of ragi flour, 3 tablespoons of powdered sugar, 1 tablespoon of yeast, and ½ teaspoon of salt.
- Add 1 cup of lukewarm water (or warm milk) and mix well to form a dough.
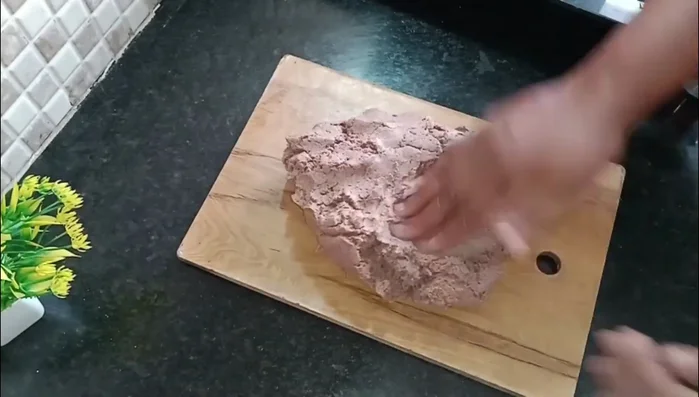
- Knead the dough thoroughly. Add 2 tablespoons of oil or melted butter for softness.
- Transfer the dough to an oiled bowl, cover, and let it rest at room temperature for 30 minutes.


- After resting, knead the dough again until smooth. Adding a cup of beetroot can improve texture.
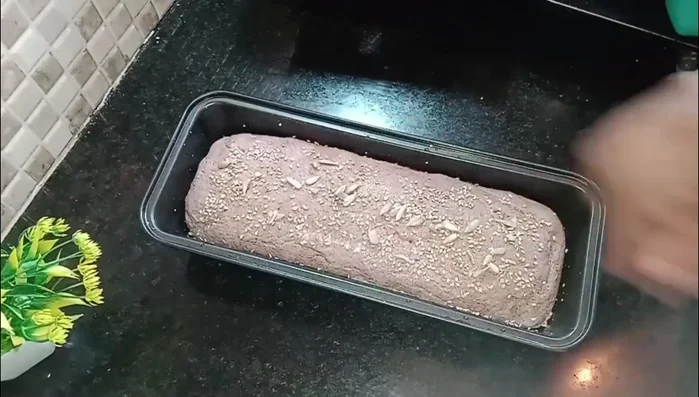
Step 2. Shape and Proof the Loaf
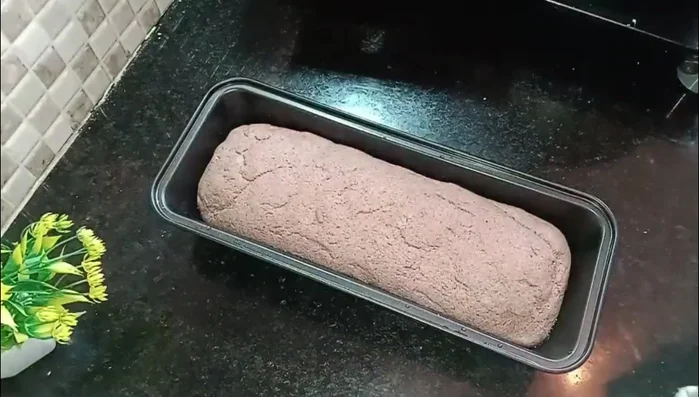
- Place baking paper in a baking tin, or grease the tin.
- Shape the dough into a loaf and place it in the prepared tin.
- Cover and let it rest for another 30 minutes.


Step 3. Bake the Bread
- Preheat your oven (or OTG) to 200°C (392°F) for 10 minutes.
- Sprinkle sesame seeds and nuts on the dough.
- Bake for 35-40 minutes at 200°C (392°F). Brush with boiled and cooled milk midway.


Step 4. Cool and Serve
- Once baked, let the bread cool completely, then slice and serve.

Read more: Easy Indian Bread Pudding Recipe: A Simple Dessert
Tips
- Using a mixture of ragi and wheat flour results in a softer, less prone to cracking bread.
- Warm milk can be used instead of water for a richer flavor.
- Adding beetroot to the dough enhances the binding and softness.
Nutrition
- N/A
FAQs
1. Can I substitute other flours for the ragi flour?
While this recipe uses 100% ragi flour for its unique flavor and texture, you can experiment with adding small amounts (up to 20%) of other gluten-free flours like rice flour or tapioca flour for a slightly different consistency. However, be aware that this might alter the final texture and taste.
2. How do I store leftover ragi bread?
Store leftover ragi bread in an airtight container at room temperature for up to 2 days or in the refrigerator for up to a week. You can also freeze it for longer storage.
3. Why is my ragi bread crumbly?
This could be due to using too little liquid or overmixing the dough. Ensure you add enough water to achieve a soft, slightly sticky dough, and avoid overmixing which can develop gluten-like structures (although ragi is gluten-free, overmixing can still create a tougher texture).
Enjoy the wholesome goodness of your freshly baked, 100% gluten-free ragi bread! This simple recipe allows you to savor the unique nutty flavor and nutritional benefits of ragi in a delicious and convenient way. Now go forth and experiment with different toppings and fillings to create your own perfect ragi bread masterpiece!