Homemade ghee, or clarified butter, is a staple in many Indian kitchens, prized for its rich flavor and purported health benefits. Unlike store-bought ghee, which can contain additives, making your own allows complete control over ingredients and ensures a superior quality product. The process, while seemingly simple, results in a golden, aromatic ghee that elevates any dish, from savory curries to sweet treats. Its high smoke point makes it ideal for cooking at high temperatures, offering a healthier alternative to other cooking oils. Moreover, homemade ghee boasts a longer shelf life than regular butter, making it a practical and delicious addition to your pantry.
This traditional Tamil recipe provides a straightforward approach to crafting your own delicious ghee. Ready to transform ordinary butter into culinary gold? Let's dive into the easy step-by-step process to make your own batch of homemade ghee, perfect for adding a touch of authentic flavor to your favorite recipes.
Tools Needed
- Stove
- Pan
- Spoon
- Strainer (cloth or metal)
- Container
Ingredients
- name: Unsalted Butter
- amount: 1/4 kg (or more)
Step-by-Step Instructions
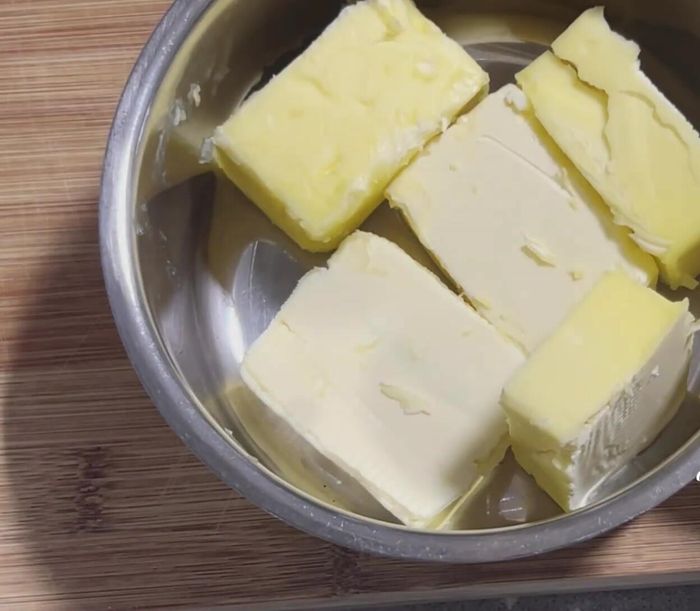
Step 1. Melt the Butter
- Cut unsalted butter into small pieces. Add 1/4 kg (or more) to a pan.
- Turn on the stove to medium heat and melt the butter.
- Once melted, stir occasionally. Avoid burning; maintain correct consistency.
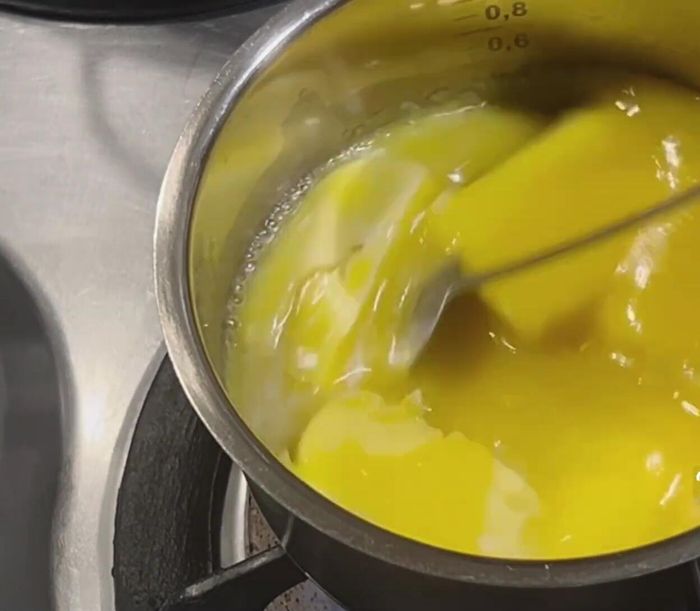
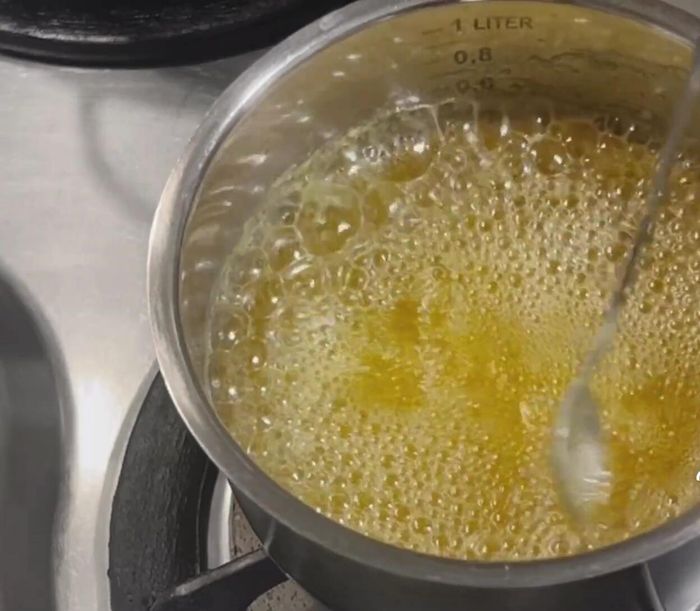
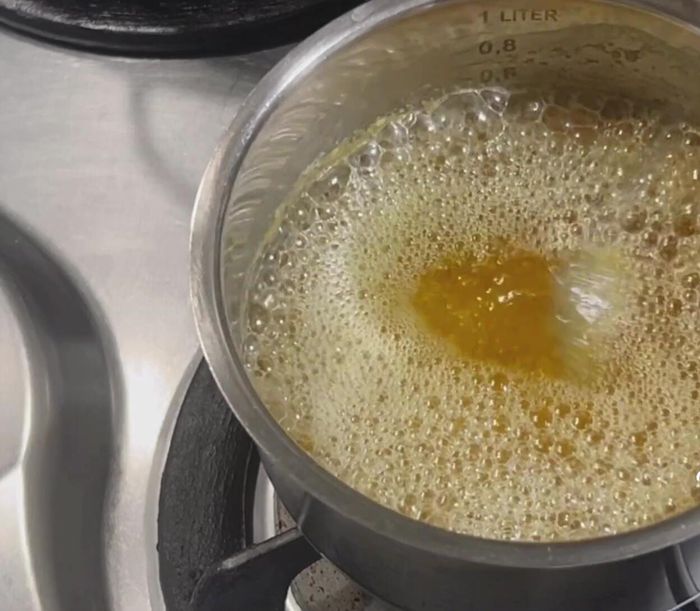
Step 2. Clarify the Butter
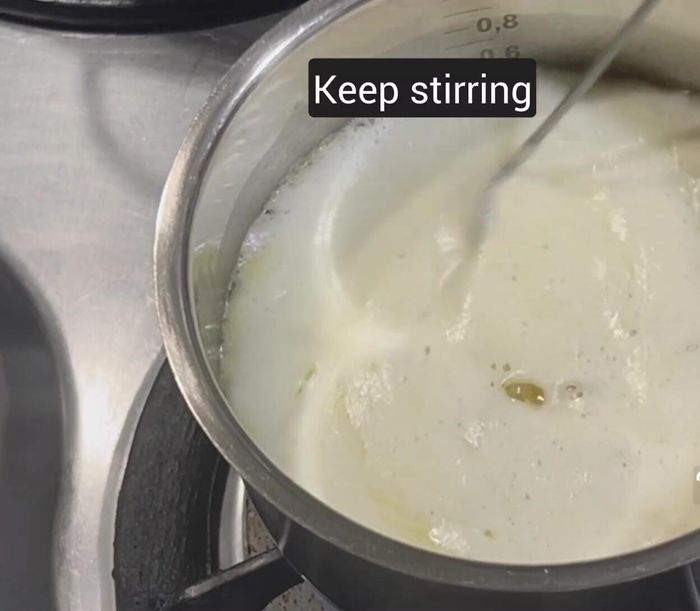
- As it becomes foamy, stir continuously with a spoon until the foam reduces and the ghee clarifies to a yellowish, oily consistency.
- Keep a close watch on the bottom of the pan to prevent browning. Continue boiling until the ghee is clear.
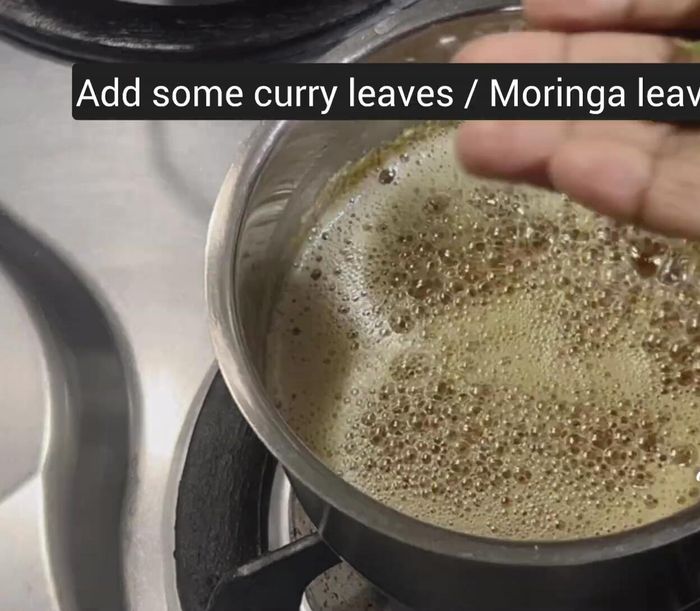
Step 3. Optional: Infuse with Flavor
- Optionally, add curry leaves or drumstick leaves and fry well.
- If adding black gram, fry until it is well-fried.
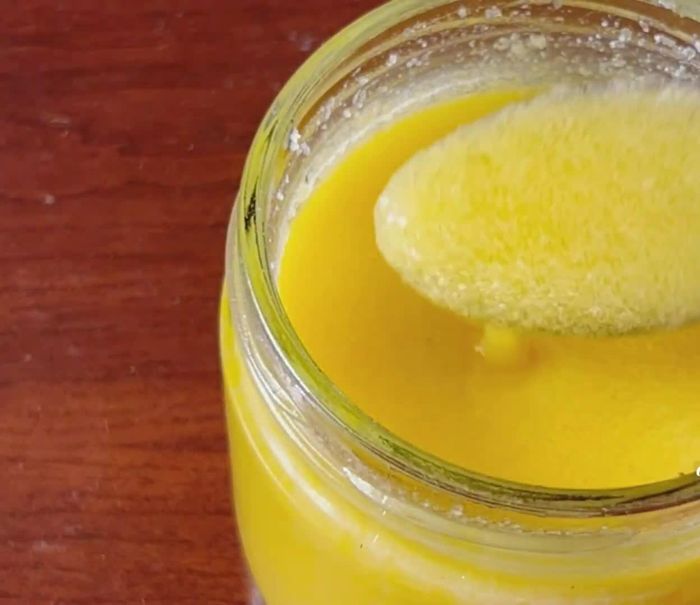
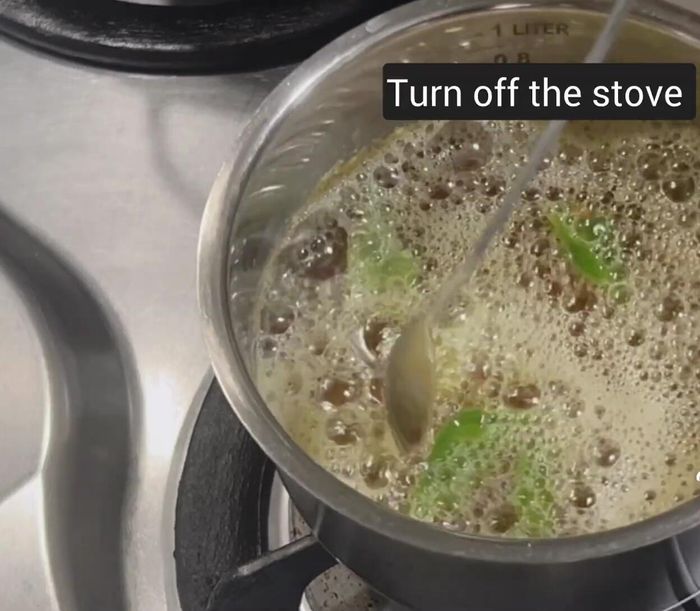
Step 4. Strain and Cool
- Turn off the heat once ghee clarifies and fried additions (if any) are ready. Let it cool.
- Strain the ghee through a clean (metal or cloth) strainer into a separate container. Do not let the ghee cool in the original pan.

Read more: Spicy Tava Pulao Recipe: Easy Indian Rice Dish
Tips
- If the bottom of the pan browns prematurely, immediately strain the ghee to prevent a burnt taste.
- The ghee should have a clear, oily surface and a thick consistency once cooled.
Nutrition
- N/A
FAQs
1. How long does homemade ghee last?
Homemade ghee, stored properly in an airtight container in a cool, dark place, can last for 6-8 months or even longer.
2. Can I use salted butter to make ghee?
Yes, you can use salted butter, but it's best to use unsalted butter for a purer ghee flavor. If using salted butter, you may notice a slightly saltier taste in the final product.
3. What are the health benefits of homemade ghee?
Ghee is rich in butyric acid, which may aid digestion. It also contains beneficial fatty acids and is a good source of fat-soluble vitamins.
Making your own ghee is a rewarding experience, connecting you to traditional food preparation methods while delivering a superior product. Enjoy the rich aroma and flavor of your homemade ghee, adding a touch of authentic Tamil culinary heritage to your dishes. Now go forth and create culinary magic!