Craving a crunchy, savory snack that's both incredibly easy to make and undeniably delicious? Look no further than crispy nimki chips! This classic Indian treat is the perfect accompaniment to tea, coffee, or even as a standalone snack. Forget store-bought versions loaded with preservatives – this recipe delivers homemade goodness with a satisfyingly crisp texture and a subtle, delightful flavor. The simple ingredients are likely already in your pantry, making this a perfect last-minute solution for unexpected guests or a satisfying personal indulgence.
Nimki chips are surprisingly simple to prepare, requiring minimal effort for maximum flavor. Their delicate, airy texture is a result of a clever dough-making technique and a precise frying process, which we'll guide you through step-by-step. Ready to embark on a culinary journey to create these irresistible chips? Let's dive into the easy-to-follow recipe and create a batch of these crunchy delights!
Tools Needed
- Mixing bowl
- Rolling pin
- Large pan
- Knife
Ingredients
- Refined flour (maida): 1/2 cup
- Wheat flour (atta): Optional, can substitute for maida
- Nigella seeds (kalonji): 1/2 teaspoon
- Salt: 1/2 teaspoon
- Oil: 1 teaspoon
- Water: 1 cup (add gradually)
Step-by-Step Instructions
Step 1. Prepare and Rest the Dough
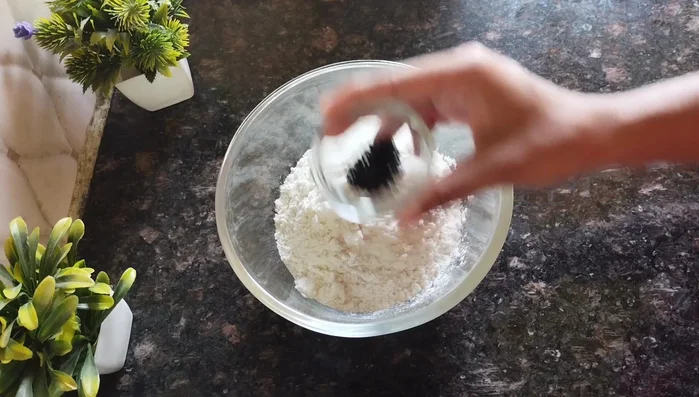
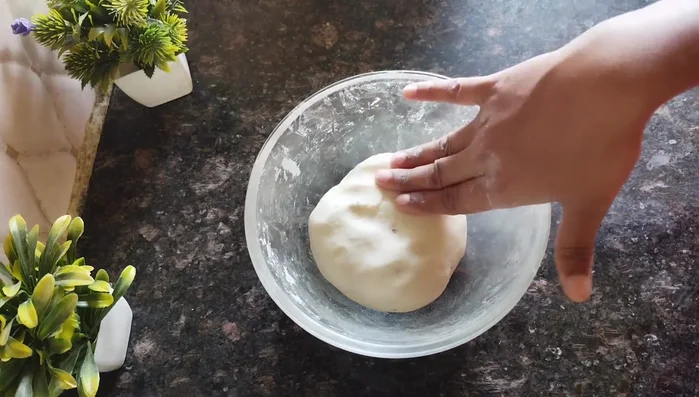
- Combine refined flour, nigella seeds, salt, and oil in a bowl. Gradually add water, mixing until a soft, pliable dough forms (similar to roti dough).
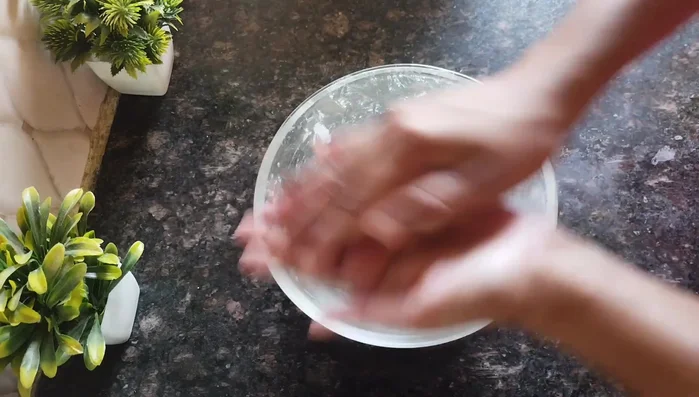
- After kneading, cover and let the dough rest for about half an hour to allow it to relax.
Step 2. Roll, Layer, and Cook the Dough
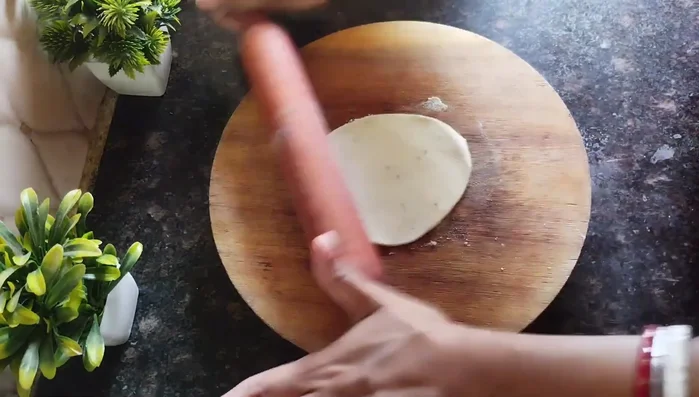
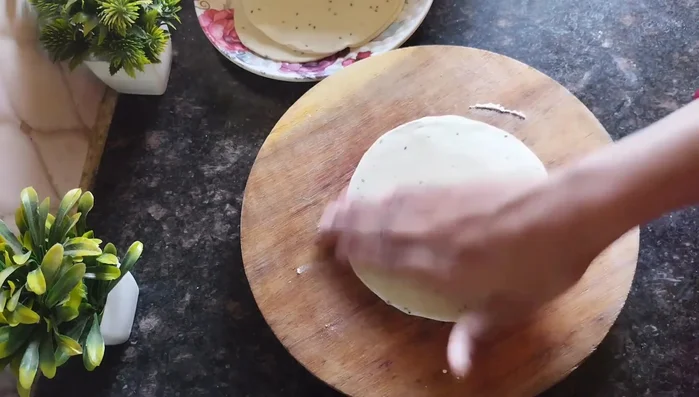
- Divide the dough into small, equal-sized balls (like small rotis).
- Sprinkle some dry flour on a surface to prevent sticking. Roll out each ball into a thin, large circle (like a puri).
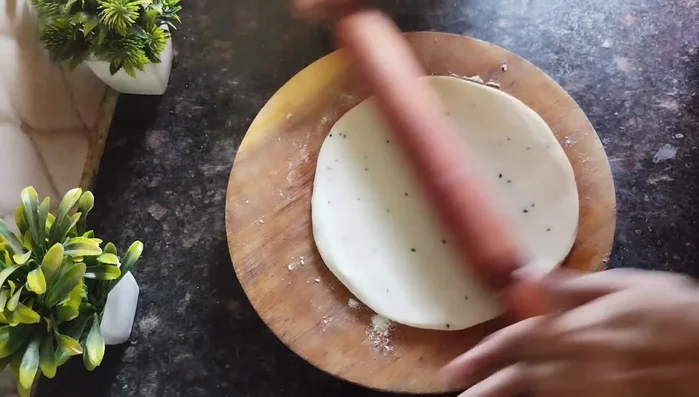
- Place one rolled circle on a clean surface, brush with oil, sprinkle with flour. Repeat this process with more rolled circles layering them on top of each other.
- Gently roll out the layered dough into a large, thin circle. Lightly heat a large pan and cook the rolled dough on low heat, flipping it to cook both sides until tiny bubbles appear (don’t overcook).
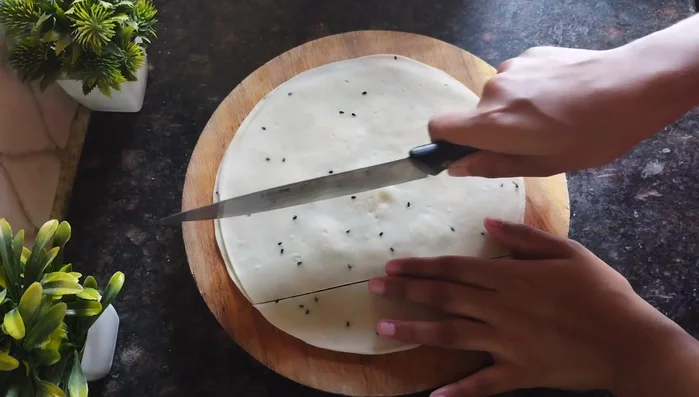
Step 3. Cool, Separate, and Shape
- Remove the cooked dough from the pan and let it cool completely. Once cool, carefully peel apart the layers of the dough.
- Cut the separated layers into desired shapes (squares, rectangles, etc.).

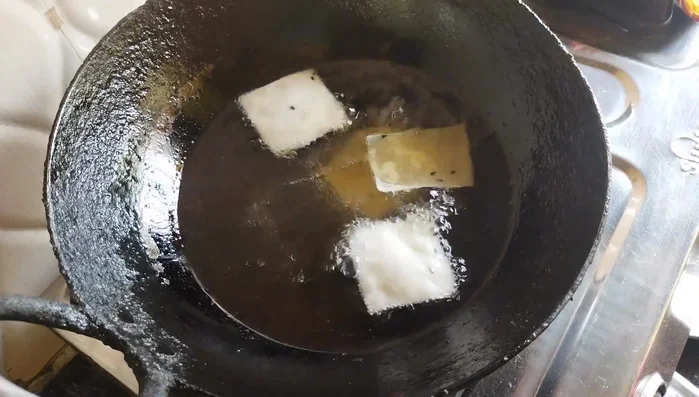
Step 4. Fry and Serve
- Heat oil in a pan and fry the cut pieces until they turn light golden brown. Fry in batches to avoid overcrowding the pan.
Read more: Crispy Chilli Chana Recipe: Restaurant-Style Crunchy Chickpeas
Tips
- Use a soft dough, similar to roti dough. Don't make it too hard.
- Don’t overcook the layered dough while cooking in the pan. Cook until you see small bubbles form.
- Allow the cooked dough to cool completely before separating the layers. This will make peeling them apart easier.
- Fry the chips in batches and on medium flame, ensuring they are evenly cooked and not burned.
Nutrition
- N/A
FAQs
1. Can I use a different type of flour?
While all-purpose flour works best for the traditional texture, you can experiment with a blend of all-purpose and whole wheat flour for a slightly healthier option. The texture might be slightly different.
2. How do I store leftover nimki chips?
Store cooled nimki chips in an airtight container at room temperature for up to 3-4 days. For longer storage, consider freezing them in a freezer bag for up to 2 months.
So there you have it – perfectly crispy nimki chips made with love (and a little bit of flour and oil!). Enjoy this delightful snack with your favorite beverage or as a satisfying treat anytime. Happy snacking!